
[su_row]
[su_column size=”2/3″]
The IA Lunch League is back in action with another exciting match up. Coming off a stretch of great matches in which both players honed their skills and strategies with the same list, they were looking to try something new. Mason was ready to the take the Imperials for a spin while Jim Bob was excited to try out some of the newly acquired Rebel expansions.
Be sure to click the List names to the right to see the specific figures and command cards.
[/su_column]
[su_column size=”1/3″]

Mason
The Spice of Weiss
Jim Bob
The Wamprats
[/su_column]
[/su_row]
Rebel Stomping
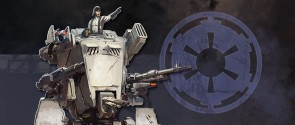 Trying out new lists means all new capabilities and strategies and plenty of room for error. But it also means lots of fun like running around in a giant AT-ST, stomping on fleeing Rebels. Or setting loose a couple of raging Wookies to run interference for your elusive Smuggler. The only thing more fun that putting a new list together is actually getting to play it. So enough talk, let’s get to it.
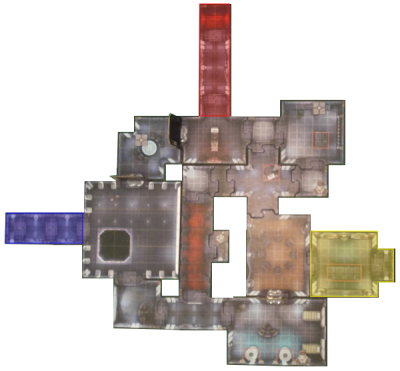
Imperial Command Hub – Uplink
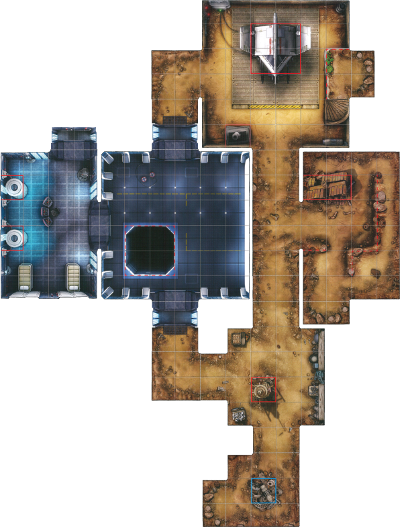 This map was new to both players so strategy was mainly being worked out on the fly. Mason took the upper deployment zone and Jim Bob set up at the bottom. The object of this mission is to the retrieve the datalink and upload it to the red terminal. There’s only one datalink though, worth 16 victory points, so the victor will undoubtedly be decided the hard way. On the surface this looks to be an advantage to Mason whose list is built for power as opposed to Jim Bob’s light and mobile squad.
Using the nimble smuggler, Jim Bob attempted a quick smash and grab for the datalink while Luke and the wookies tried to create a diversion. Mason was not to be fooled, using the powerful General Weiss and superb positioning to cover both approaches and take out Luke early in the second round. Luke’s sacrifice allowed the smuggler to escape with the goods and began a dangerous game of cat and mouse between the two sides. Jim Bob’s Wookies dove into the Imperial line with the Saboteurs backing them up, but the AT-ST proved particularly good at soaking up damage. (where are those stupid ewoks when you need them?)
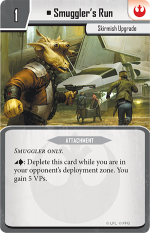 Trying desparately to avoid the awesome firepower of General Weiss, the datalink carrying smuggler slipped back and forth across the map while both sides traded fire. The Wookies were able to take out the Imperial Officer and a Royal Guard but fell before they could stop Weiss. The trio of Jyn, Gideon, and C-3PO were able to put an end to the E-Web Engineer, but the remaining Royal Guard slipped through their ranks to chase after the Saboteurs attempting to finish off the General. In all the fray, the Smuggler made a run through the enemy deployment zone to pick up 5 critical points before the AT-ST picked him off.
Beginning with the last activation of the 3rd round, there were 4 lead changes with the outcome being decided on the final roll of the game when Jyn was able to take out that last Royal Guard. All in all this was an extremely close game to the very end. Had the game not been stopped for time, it may very well have turned out differently.
FINAL SCORE
Jim Bob 26 – Mason 22
(time limit)

 Perhaps the most important lesson learned so far in our first few skirmish matches has been SYNERGY – figures making other figures better and more effective at offense or defense or sometimes both. One thing that has been very clear from these early match ups is that Chewie’s team has it and Boba has been sorely lacking. The Furries make each other better with defensive bonuses and shared command cards, which among other things has made them harder to kill. Fett’s new team is hoping to pack a bigger punch with the addition of two figures that can apply the focus condition to teammates as well as building around characters who share the Hunter and Brawler traits for improved command card sharing.
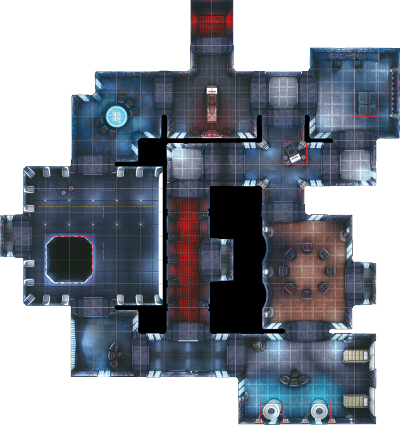 Kuat Space Station is currently in the official skirmish map rotation for tournament play, but this is the first time it has made an appearance at the IA Lunch League. This map offers an interesting mix of objective play and combat flash points. The objective is to control the data core found the in upper left room, which will give you 10 victory points at the end of each round. The trick is that a door to the data core room can only be opened by a figure controlling a terminal at the beginning of a round and then at the end of each round both doors shut automatically.
 The MVP of the match was definitely the Trandoshan Hunters. Working in pairs, their Relentless attack kept the pressure on the Furries and caused Mason to burn through his command deck, which he had used so effectively in previous games, in order to keep from taking additional damage. The Trandoshans holding the front line also allowed Fett and the Nexu to stay behind them, supporting both groups and popping in to attack where most needed. The added element of Focus from Gideon and C3PO made sure these groups hit hard.
 This is a slightly expanded version of the Kuat Space Station map with customized mission objectives to suit a 3-player skirmish scenario. The mission objectives focus on the leader of each strike team. Points are scored normally through combat but when the strike team leader kills a group, the player is awarded double the Victory Points. At the end of the round if the strike team leader is still alive, an additional 2 Victory Points are awarded! As usual, first player to 40 points wins.
 As the lead began to build, Fett and Chewie got into gear with one common goal between them – stop Vader or this show is going to be over with real quick. They both put forth a good effort, getting some damage in but more importantly putting stun and weakened conditions on him. It looked like the tide might be turning at that point, but Jim Bob was able to rally with the powerful Rally command card to shake off the harmful conditions and continue the Brutality. That left Vader free to take down Fett and with double the points, easily secured the victory.
 The Fett Strikes Back? Jim Bob definitely hopes so, but rest assured Mason and his furry gang will have something to say about that. Since both players are running the exact same lists again, it will be interesting to see what (if any) lessons were learned from the lopsided victory from a week ago.
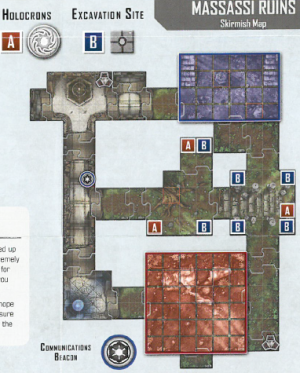
 The pivotal moment came at the beginning of the second round when Mason played the Shadow Ops command card, completly disrupting Jim Bob’s strategy. Fett ended up getting defeated after much of his side’s planned offensive moves were negated by the timely command card Mason drew at the beginning of the round. At that point Jim Bob went into scramble mode. He managed to scrap for 10 points with a successful holocron transmission but in the end, all of his units were defeated (curse your furiousness, you Furries!!!).
 The Imperial Labor Camp map was selected at random from a list of maps neither player had played previously to provide an even playing field. The mission’s objectives were simple, infiltrate your opponent’s deployment zone with at least one figure to receive VPs at the end of the round. Of course, points are awarded on the spot for combat victories, and it’s obvious from first glance that there will definitely be some violence going down on this map.
Recent Comments