Dicehaven

Tabletop RPG Podcast and Roleplaying Resources

Page 73 of 126

IA Skirmish Debrief – 2/25/2016

[su_row]
[su_column size=”2/3″]
Yay! With a second meeting in the books, the IA Lunch League can now be considered a thing. Again the attendees were Mason and Jim Bob, both seasoned skirmish newbs in their own right. This is the first Lunch League game to employ player created Lists using the super handy IA Army Builder. (Bonus points to Mason for winning the super awesome name contest)

Be sure to click the List names to the right to see the specific figures and command cards.
[/su_column]
[su_column size=”1/3″]
ImperialAssault-TransparentLogo

Mason
Furious Furries
Jim Bob
Fett’s Alliance

[/su_column]
[/su_row]

Chewbacca vs Boba Fett

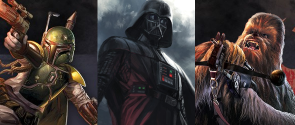
swi11_previewThe galaxy’s best sidekick facing off against the infamous bounty hunter that sold his buddy to Jabba the Hutt? Come on, could this match up be any more exciting?! Closer inspection of the two sides will reveal two very different list strategies. games-swia-chewyThe Furious Furries are made up entirely of powerful unique figures while Fett’s Alliance consists mainly of weaker multi-unit support deployments designed to overwhelm with numbers. Each philosophy has its strengths and weaknesses and therein lies the beauty of the endless combinations one can employ in the IA Skirmish game. Clearly the highlight of this clash will be seeing Chewie and Boba Fett wreak havoc in their own unique ways.

Imperial Labor Camp – Infiltration (Mission B)

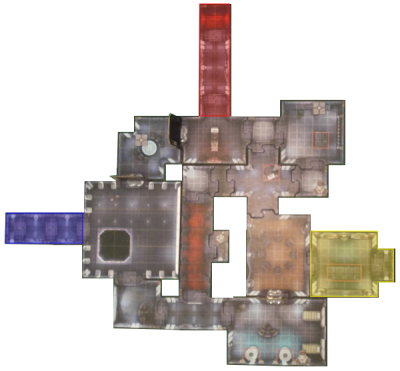
map_imperial-labor-campThe Imperial Labor Camp map was selected at random from a list of maps neither player had played previously to provide an even playing field. The mission’s objectives were simple, infiltrate your opponent’s deployment zone with at least one figure to receive VPs at the end of the round. Of course, points are awarded on the spot for combat victories, and it’s obvious from first glance that there will definitely be some violence going down on this map.

After all the hype, this match turned out to be completely one-sided. Mason’s Furious Furries stormed out of the gate, immediately snatched up the bulk of the energy shields, and then set up in wait for the unsuspecting Imperials to come bumbling into their trap. Fett’s Alliance did not disappoint them, as Jim Bob turned in a performance of questionable tactics and general incompetence that should have earned him a good Force choking.

This match seemed to take a bit more time, most likely due to its combat heavy nature. Neither team had reached the deployment zones by the time limit, but victory was clearly in Mason’s furry hands. With Fett on the verge of being dogpiled and only a measly Stormtrooper and Officer to bail him out, Jim Bob wisely conceded the day.

FINAL SCORE

Mason 15 – Jim Bob 0
(time limit – victory conceded)

IA Skirmish Debrief – 2/18/2016

[su_row]
[su_column size=”2/3″]
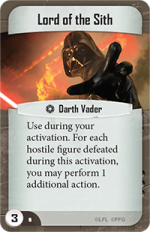
This was the first meeting of the IA Lunch League, with Mason and Jim Bob in attendance. Mason had never played the skirmish game type but was familiar with the campaign game and basic IA rules.  To learn the skirmish mode, the suggested map and lists from the Skirmish Guide were used. Mason chose the rebels, so Jim Bob succumbed to the power and seduction of the dark side!

Click the List names to the right to see the specific figures and command cards – built with the super handy IA Army Builder.
[/su_column]
[su_column size=”1/3″]
ImperialAssault-TransparentLogo

Mason
Default Luke List
Jim Bob
Default Vader List

[/su_column]
[/su_row]

Luke vs Vader

swcelebration_previewIt’s as if one of the most quintessential Star Wars scenes is unfolding right before your eyes, but this time the fate of galaxy rests on your shoulders (hint: use the force). While there are endless options for putting together your own IA Skirmish Army, the suggested lists in the Skirmish Guide are the perfect starter for a learning the ins and outs of the game. Playing arguably the two best characters in the game (Luke seems to be the popular choice, but there is no denying Vader can wreak havoc on the ill prepared) is a great way to start.

Mos Eisley Outskirts – Get to the Ship (Mission A)

mos_map_skirmishAs it turns out, the outskirts of Mos Eisley are an even wretcheder hive of scum and villany! (Ben… why didn’t you tell me?) Mason chose the Blue deployment zone and Jim Bob lined up the Imperials in the Red zone. The primary objective was to control the red launch panels (marked with the “A”) on the ship in the center of the map. Doing so would give you 2 victory points (VP) each at the end of the round or 5 VPs if you spent an action to flip them over. Of course, you can also score lots of points just by blasting the other team (and come on, which one of those is more fun?) First one to 40 wins.

For sure, Jim Bob’s previous experience with the map came into play here, though one should not underestimate the power of Vader going beast-mode on the Rebels. While Luke’s pitiful band had their hands full with the Sith Lord Supreme, the Imperial Storm troopers made quick work of securing the objectives and putting points on the score board. The Rebels finally started to whittle away at them while trying to avoid Vader but it proved too little, too late.

FINAL SCORE

Mason 8 – Jim Bob 44

50 Fathoms: Session 20- Trouble at Brigandy Bay

Brigandy bay

Trouble at Brigandy Bay


Characters:

  • Mordecai: Human Air Mage Puritan from Earth
  • Daxson: Doreen treasure diver native
  • Crow/Kadian: Atani guardian of the Great Tree
  • Kaliferous: Kraken mage
  • Rodrigo: Human priest and water Mage from Earth
  • Kukukachoo Grael guest star

Date: 2-27-16

XP: 2

Recap:

The Crew head to Brigandy Bay to repair, rest up and setup some trading deals. Upon arrival Daxson and Crow they attempt to talk to their smuggling contact Saricks who works for the Coalition and operates out of the Black Queen. Upon entering the Queen they are stopped and told the Coalition wants to speak with them. They manage to speak with Saricks but are not allowed to leave the Queen without a bar fight with a Graul and two Half Ugak bouncers.

Father Rod, Mordecai and Kukukachoo setup the standard Soup Kitchen but are attacked from a mysterious robed figure and several henchmen.  They manage to take out the henchmen and attempt to capture the robed figure who turns into a bat and flies away. They find all the henchmen have a red blood drop tattoo on their body leading to more questions than answers.

Heading back to the ship the Crew wisely set up a watch rotation and find themselves attacked yet again by the Kehana Crimson Sparrow and his crew. (GM note: Crimson Sparrow was one of the slaver leaders of Jomba Town who escaped because Bracus was being greedy). Sparrow managed to slip on board and attack Daxson but proved no match for Daxons skills. Overall the pirate attack was repelled but not without some bloodshed

It seems Brigandy Bay is no longer a safe place. Has the Crew made too many enemies? Where else does danger lie?


Blackshroud


Kaliferous

High Admiral Caspian,


We recently made port at Brigandy Bay.  The crew has had previous dealings with the local smuggler king, Sarricks, and believed he might have useful information.  Having no previous involvement with Sarricks, I chose to accompany the other crewmen.  I was also very curious about their plans.  It turns out Father Rodrigo is the one setting up these soup “kitchens” I’ve heard rumors of.


The experience was interesting.  Many came to be fed.  Few were noticeably impacted beyond temporary satiation.  In my opinion, little of substance was accomplished.  Notably, the crew was rather supportive of the effort despite this.


The most significant moment of these last few days was the attack against us while Rodrigo was working his kitchen.  The only detail that is of import is the strange entities that attacked.  One escaped by transforming into a bat and flying away.  As you know, this is odd.  Changing one’s shape is almost unheard of.  I only recently learned shapechanging was even possible through Kadian, who swears our attackers used magic different from his.


The humans in our group fear they are an evil creature from their world known as vampires, who are the work of the devil.  Their descriptions were rather vague and decidedly unacademic.  This leads me to believe the humans have made no official or concerted effort to study vampires.  As such, all I can say with certainty about them is they use magic and can shapechange.  If they are indeed purely evil as the humans claim, I recommend we make what effort we can to eradicate them before they become a larger problem.
Kaliferous, Archmage of the Kraken fleet


Crow

Back in Brigandy Bay and Brigands All around

– Through the Eyes of a Crow

Seeing the Great Kraken Ship with the gleaming gold ball edge over the Horizon.  I am beaming with pride.  What a great experience, we met the mighty leader Admiral Caspian of the Kraken.  Earned his trust and we have the mighty Kraken weapon in our control.  Huzzah!  One more piece in the puzzle to defeat the hags.  Once again tested and we pass the ordeal of fire.

So again we are on our way to Brigandy Bay.  After docking Captain Daxson tells me to come along as we are heading to our smuggling contact Saricks who works for the Coalition and operates out of the Black Queen.

Upon entering a crazy human bartender seems to act out of dis-respect to our captain and his crew.  She tells us with indifference we can’t see him and we must wait in the bar.  And we wait for much too long, finally the Captain and I turn to leave.  But we are blocked at the door, by a Graul and two Half Ugak brothers.  This was their mistake.  We use agility and skill, not to kill them, but cleanly get past them and head to the ship.  Latter I fly into Saricks room as carroway screecher and deliver a message to Saricks to meet us.  

Back on the ship, we find out that Father Rod, Mordecai and Kukukachoo setup the standard Soup Kitchen but are attacked from a mysterious robed figure and several henchmen.  They claimed a crazy robed figure who turned into a bat and flies away. I found that hard to believe.  But I guess, I can change into a caraway screeacher, maybe there are creatures like me out there.  Hmmmm
Heading back to the ship, I asked the captain should I double the watch and he agreed.  So we set up a watch rotation and found ourselves attacked yet again by the Kehana Crimson Sparrow and his crew.  Sparrow managed to slip on board and attack Captain Daxson, but proved no match for Daxons skills.  I fought bravely on the deck and helped repel the foul pirates.  It seems that Brigandy Bay earns it’s namesake that there are Brigands all around.


50 Fathoms: Session 19- The Sphere

Kraken_Sphere

The Sphere

Characters:

  • Mordecai: Human Air Mage Puritan from Earth
  • Daxson: Doreen treasure diver native
  • Crow/Kadian: Atani guardian of the Great Tree
  • Kaliferous: Kraken mage


Date: 2-13-16

XP: 2

Recap:

The Crew after much deliberation decided that they had to go after the Kraken Sphere and through the Burning Sea to get it. Navigating the treacherous maze of flames they managed to find the Sphere and not to set their ship ablaze in the process. They find the object covered in a mass of seaweed but towering 200’ above the water. With some effort they recover ropes from nearby wreck and secure it to the ship, the task of towing this huge object before them.

Without warning they are attacked by fiery creatures from below. Half man half reptile and covered in flames. These creatures board the ship and attempt to set it on fire while attacking the Crew. As the crew battle against these fire salamanders, the mass of seaweed covering the Sphere sloughed off and begins to coalesce into a large Seaweed Fiend. Its first action is to grab two of the cannons and pull them off the ship. Crow, thinking quickly, glides to the deck and sets both cannons to fire, unfortunately for the Seaweed Fiend they are both point blank and aimed at his face. The Fiend being blasted into oblivion changes the tide of the battle for our heros and the Crew manages to fights off the fire salamanders and escape the Burning Sea. Fortunately there are healers onboard because Crow was heavily wounded and incapacitated during the battle.

Upon leaving the inferno, they find the colossal Kraken Great Ship waiting for them. They are invited aboard by a host of amazed Kraken and taken to see the great Admiral Caspian. He thanks them for their bravery, listened with fascination to their story and then to the surprise of all the Kranek under his command, gives the Sphere to the Crew. He tells them that the Sphere is a great weapon to be used against the Sea Hags. While its power is great, but he does now know what it will do or how exactly it can help. In order to open the Sphere the Crew will need both an Archmage and a Human to lay hands on the device and agree to some unknown sacrifice. He tells the Crew he will tow the Sphere behind the Great Ship and the Crew can use a magical bone whistle to summon him when the time is ready for it to be used.


Fire Salamanders_1


Crow

Fire Tests Gold – Suffering Tests Brave Men
– Through the Eyes of a Crow

As we are heading for Brigandy Bay, we navigate by the edge of the Burning Sea and encounter a smoldering and badly damaged Kraken Skiff. Aboard we find a burned and dying kraken named Halimas, who with a quiet and wounded breath, tells us we must find an important object in the Burning Sea.

We realize Halimas is a Military Officer, in the Kraken navy and a Captain.

We discuss as a leadership of the mighty Liberator’s Wraith, should we enter the burning sea to secure this vital object. Daxson’s concern over fire, makes our mighty captain deeply concerned of the risk. We have these discussions in private, as so the crew will never see Daxson’s concern. For he is our Captain and shall always be strong in front of the crew.

Finally, after long debate, Daxon agrees to allow me to shift into the beautiful Carroway Screacher and fly over the burning sea to determine distance, confirm the object and even see if we can navigate a course.

During my flight, I locate a path, even though the fire of the burning sea is shifting. In addition, I see a large object some couple of miles in. Covered in moss and battered ships. There are hints of gold beaming out from the wreckage and moss that covers this enormous orb.

Upon my return from the flight over of the burning sea, we discuss as the leaders of the Liberator’s Wraith and agree to nurse Halimas to health. He is an able Captain and Daxon agrees to allow him command the ship in the place of Daxon. We tell the crew that the Kraken captain has experience in entering the burning sea, as he has done so before, as to not tip the crew to Daxon’s fear. Then Captain Daxon goes below deck, as we enter the burning sea, it seems to be allot to handle for our leader.

We all support our captain, his actions have saved our very lives as recently as the last ship battle vs. the Spanish Inquisition ship. We will always support him, as he is our captain.
After navigating through the burning sea, loosely following the path I had just flown just hours before, Halimas safely navigated us to the large golden circle, this supposed weapon of the Kraken empire..

In this area the fire was less intense, and Daxon sensing the ship stopping, fought his fears and came above decks. He and I discussed using his swimming and my gliding to use ropes and tie a tow line around the massive golden orb. We set about our task of securing the orb and completed it quickly.

Once back on the ship, suddenly these burning elementals appeared climbing out of the water itself attacking and killing many of our crew. I quickly flew to the Crow’s nest to fire my musket. They were killing our crew with their violent flames. I yelled the order for the crew to throw water on these foul creatures. As our ship fought to defend their very lives.

Then suddenly as if these deadly flame creatures were not enough. The Moss on the very orb itself formed into a massively large Moss Creature. This creature formed away from the ship, but was over 30 feet high rising out of the water. It then flung moss onto the boat and moss men started to attack. Next it grabbed the cannon’s from our ship in an attempt to rip them from the mooring.

I realized this was our only hope and glided from the crow’s nest to the deck of the ship and lit the very cannon it had in its mossy grasp. Blowing a huge piece out of the creature. Then before it could act, stunned by the very force of the first cannon, I moved to the second and blew the creature into oblivion.

We were all fighting side by side to eliminate these deadly living flames from our ship, one crew, and one purpose. Brave and mighty men of Caribdus battling for the freedom of the world. Then, in the midst of the fight, out of the corner of my eye, I see the new Kraken mage cast a spell on the blade of our Captain Daxon. Daxon’s arms and blades burst into flames, I feared he would panic, but instead in the midst of this burning sea, fighting these burning creatures, with his arms and sword ablaze. The very fear of flames was burned from his soul and he fought with the courage of the great whale to protect his crew. Perhaps cured of his fear of flame.

Then I turned and saw our crew, many dead at the hands of these flaming demons. And I started to fight these flaming beasts for our very lives. As I acrobatically dove into the fight, one of the flaming elementals continued to challenge me at every turn, I could not avoid him and finally I was lost. As I passed out from the pain and the flames, I dreamed is this my end… I just died after my dear friend and mentor Captain Liam.

Then suddenly, I awoke at the hands of Father Rodrigo, who heals me with his pure waters and brings me back from near death. All was quite the flaming creatures were no more.
So in my weakened state, I helped the Captain to successfully navigate out of the burning sea. It seems something changed inside Daxon this day. Seemly no longer concerned with the flaming waters.

Upon our exit within a short period of time we see the Great Kraken Ship on the Horizon. We are invited aboard and meet the mighty leader Admiral Caspian of the Kraken. After a long discussion, he realizes we have the same cause to cure this land of the curse of the Hags and lower the waters. He agrees to puts the mighty Kraken weapon in our control. Huzzah! One more piece in the puzzle to defeat the hags. Once again tested and we pass the ordeal of fire.


Kaliferous

High Admiral Caspian,


Being you have already been made aware of the events which transpired regarding the Sphere’s retrieval, I will discuss my thoughts on my new crew within this report.


One of the most striking characteristics of the crew is their resilience.  It is most notable in their handling of the recent loss of their captain.  He was, from all accounts, a most capable and extraordinary man who the crew depended on heavily.  To be sure, the crew as a whole is full of such men.  Yet, they are not the captain and to lose such a captain amidst the great struggle they were in has broken lesser crews.  Those of the Liberator’s Wrath, however, still stand as unified and determined as they ever were.


Their new captain, Daxson, is proving rather capable.  His willingness to seek and truly consider the counsel of his officers is commendable.  Mordecai and Rodrigo have surprising magical talent for individuals not native to Caribdus.  Kadian, the Atani you met, is a Shiani and practices an extremely rare form of magic gifted to such.  My impression is the Shiani are a rare kind of holy warrior.  I intend to make extensive notes of my observations of his magic for further study.  I will include these notes with my reports for our mages.  Even Brachus, the ships super, is atypical for his species in his apparent overcoming of the greed which is so prevalent among the Scrurillians.  Perhaps the theory that greed was an inherent characteristic of the species is in correct.  Given my familial link to these creatures, I am most intrigued by Brachus and his attachment to this crew, and shall make further study.


I must confess, High Admiral, that some recent actions of mine have potentially damaged my position with this crew.  As you have advised, I have been cautious in the use of magic around new crews.  Unfortunately, I was forced to take action which resulted in the death of several crew members.  While I am confident it was the right choice, the crew will not likely agree.  Hopefully, reason will trump emotion and I may continue serving as a member of this crew.  If events go unfavorably for me, I will strive, as always, to continue the great mission to the best of my abilities.


Kaliferous, Archmage of the Kraken fleet


50 Fathoms: Session 18- Escape from Paltos

Ship_Battle_2

Escape from Paltos

Characters:

  • Mordecai: Human Air Mage Puritan from Earth
  • Bracus: Scurillian merchant and Super native
  • Daxson: Doreen treasure diver native
  • Rodrigo: Human priest and water Mage from Earth
  • Crow/Kadian: Atani guardian of the Great Tree

Date: 1-30-16

XP: 2

Recap:

After the loss of the Captain, with no time to regroup the Crew set sail in an attempt to avoid the Galleon which is bearing down on them. While a good attempt was made, the ship was spotted by and marked with a light spell from the enemy. The Crew managed to put up a fight and fired chain shot at the Inquisition ship to slow it down. After a furious exchange of cannon fire the Liberators Wrath was seriously damaged, but managed to slip away. As a fog bank descended on the sea the Crew fired one last departing volley and with a spectacular explosion the Galleon was no more.

Without further drama the Crew set sail to Kiera, repaired and then departed for Brigandy Bay. Along the way they stumbled across a sunken ruin which they looted and on the edge of the Burning Sea a badly damaged Kraken Skiff. Aboard they find a burned and dying kraken named Halimas who tells them they must find an important object in the Burning Sea.

What is this object? Is it important enough to risk their ship and their crew again?


Burning_Sea


Crow

Out of the Frying Pan and Into the Fire.
– Through the Eyes of a Crow
We broke and ran to the cliff, I glided down after Tomas was over the side. As I was gliding down, I saw another ship full lights on heading down towards our ship. Out of the frying pan and into the fire.

At the orders of Captain Daxon, I worked to get the rigging and sails unfurled. We are on the move. Then I looked to the sky and saw Liam my surrogate father and mentor being clutched in the Rocs talons fighting fiercely as he was carried north towards the mountain peaks.

The Captain is dead, long live the Captain. His bravery will last in us all forever.

We did not have time to honor him, as we should have done that will come later. But his blade fell to the deck, I asked Daxon if I could carry it. As we carry the spirit of Liam. Daxon honored me by allowing it. At that moment, sadness at the loss of the man and happiness to have known him and the bravery he has shown to save our Caribdus.

No time for more thoughts of the captain as an Inquisition Galleon was bearing down on us at an amazing speed.

At Captain Daxon’s orders we worked to evade quickly away, then in a moment we were illuminated by a blinding light. A mage had flown over to our ship an cast a light spell. We fired arrows and cast spells at the mage to get him to evade. Then Inquisition Galleon fired upon us, striking the ship, all of us crew wonder would she hold, would the Liberators Wrath take the round. She was wounded but we kept moving. We then returned fire furiously targeting the sails of the Galleon, working to slow down the advance of the larger ship. Then fire hit the back decks, the Captain froze, we knew of his fear of flame. But as a family and crew we helped the captain, Father Rodrego putting out the fire and I barked orders to the crew to keep firing at the sales of our enemy.

Then Daxon snapped back when the flames died down and he masterfully captained us to a major victory. As we were slipping away, a fog bank descended we fired one last departing volley and with a spectacular explosion the Galleon was no more. Huzza!!

We set sail to Kiera, for repairs. But on the way, we honored Captain Liam and had drinks in his honor. We all said kind words for the heroic leader and mentor.

After repairs at Kiera, we then departed for Brigandy Bay. Along the way they stumbled across a sunken ruin which they looted and on the edge of the Burning Sea a badly damaged Kraken Skiff. Aboard they find a burned and dying kraken named Halimas who tells them they must find an important object in the Burning Sea.


« Older posts Newer posts »

© 2025 Dicehaven

Theme by Anders NorenUp ↑