I’ve played Savage Worlds off and on for many years. Along the way I’ve learned a few things, and I’ve also seen helpful tips on the various Savage Worlds forums on how to speed up your game and make things run more smoothly. Here are the top tips I have for anyone running a Savage Worlds game.
Category: Savage Worlds (Page 1 of 2)

I recently purchased Savage Worlds Pathfinder. Savage Worlds has some drawbacks but with some house rules to speed things up and limiting NPC explosions so you aren’t so apt to get one-shot-killed, it can be a lot of fun if you’re in the mood for a miniatures-focused game.
After having played in Shane Hensley’s Savage Worlds game at ChupacabraCon II in Austin recently, I wrote up my observations of his game in a series of four blog posts:
- http://swshinn.com/savage-worlds/shane-hensleys-con-game-table-setup
- http://swshinn.com/savage-worlds/shane-hensleys-con-game-initiative
- http://swshinn.com/savage-worlds/shane-hensleys-con-game-miniatures
- http://swshinn.com/savage-worlds/shane-hensleys-con-game-gming-techniques
In summary, here are the specific things I plan to do differently in my games going forward after having observed Shane’s techniques:
- Extensively use Fatigue in scenes — for example, dealing fatigue as a sort of ‘wound’ if the player fails an Agility check.
- Use the Initiative Countdown technique for card initiative.
- Use an Indecision Countdown when players have analysis paralysis.
- Keep the Bennies flowing and award bennies very liberally, even for actions that aren’t based on a Hindrance.
- Use Triggers, especially at Con games.
- Use the Critical Failures setting rule (not allowing you to benny snake-eye rolls). I will attempt to create a Critical Failure table for my different settings with ideas on what happens narratively in those circumstances.
- Manage Wild Cards and Extras differently in terms of up/down/off-the-table status (Extras are up/down/off-the-table, Wild Cards are up/up-with-status-markers/down.

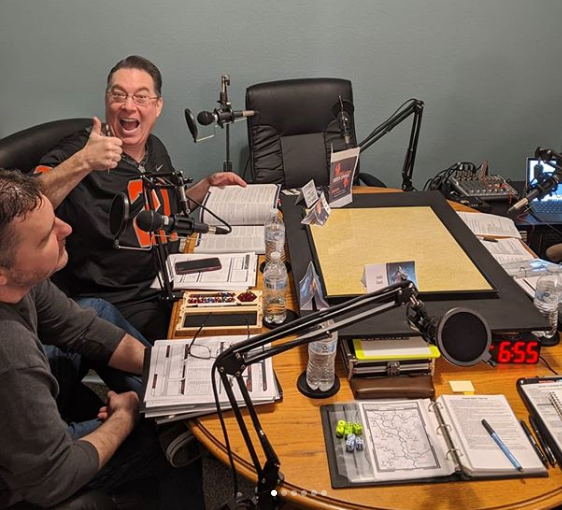
Stan Shinn (far left) playing in a Shane Hensley game
Lessons from Shane Hensley’s Con Game: GMing Techniques
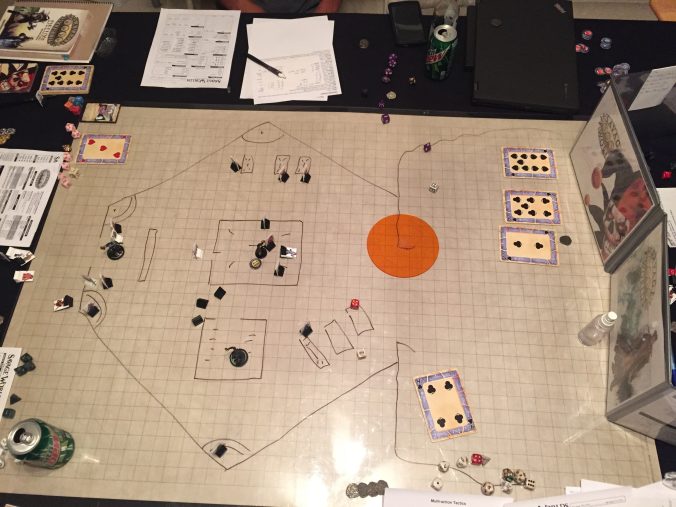
After having reviewed Shane Hensley’s table setup, use of miniatures, and techniques for handling initiative, I will now review the variety of GM techniques that he used during his East Texas University con game. Among Shane’s techniques were an ‘Indecision Countdown’ and a thing I call ‘Triggers.’ I thoughts his methods were masterful! Here’s a full breakdown:
Fatigue
Although I know there are fatigue rules, most games I’ve played in or ran by and large ignored the fatigue rules. Only time I’ve seen it used is when there is something like snow or heat that is a general hazard that wears you down.
Shane however used the fatigue rules extensively. In fact, more scenes had situations where characters took fatigue injuries than fights were they became shaken or took wounds!
One example was my character who jumped into a lake in a quarry but failed an Agility role. Shane said the character “pulled his groin” and therefore took one point of fatigue for the rest of the scene. Another character faired even more poorly than I did in jumping into the lake — he tore up his leg on a submerged car wreck. He received a point of fatigue until he could get stitched up by folks at the EMR. In yet another scene, traps from our enemies had us fall into small pits that had broken glass — again, we were described then as being cut up and taking fatigue.
I will definitely follow Shane’s example and work in more fatigue into my games!

Marching order — guy in the middle will take Fatigue due to a trap!
Drama
There were two areas I notices where Shane keep the story moving and rewarded good roleplaying.
Bennies Kept Flowing
Shane really kept the bennies flowing. I’d say each player got 3-4 bennies per player on average at different points during the game. It seemed like anything that was a particularly good roleplaying moment — being clever, doing something really funny, etc. — was worthy of a bennie, even if it didn’t tie directly to Hindrances.

The bennies flowed freely!
Indecision Countdown
Shane also used a countdown technique to keep people from getting into analysis paralysis. Whereas players will often spend 10 minutes debating strategy on something that the character would only have seconds to decide on, Shane cut this short by starting to say “What are you doing? 5…4…3…” We never found out what would happen if he got to ‘1’ since it always created a bit of a panic on the player’s part to make a decision. It worked great and keep us moving at a fast and furious pace!
Triggers
Shane used a technique that I’ve also used. I call it a ‘Trigger.’ Basically, con games which use a ‘trigger’ run for four hours and follow this pattern:
- Opening — Initial scene with a hook. In Shane’s game he read some boxed text from his adventure notes (the only point in the game where he read any text from his notes). He said that all the PCs knew each other.
- Prep — Investigation, strategy, and generally players running around in sandbox fashion for several scenes preparing to accomplish the goal (to fight a bad guy, rescued someone, pull off a heist, etc.). In Shane’s game it was a Scooby-Doo type investigation.
- Boss Scene Trigger — Regardless of what the PCs are doing, something ‘triggers’ the final climactic scene. This happens about 1.5 hours before the end of the game.
- Boss Fight — Big set piece battle which runs for 1:15 or 1:30 minutes.

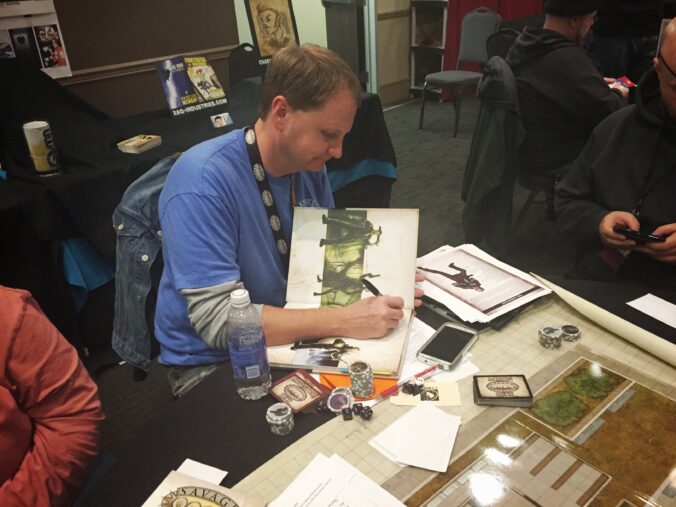
Shane reading the intro. boxed text.
In Shane’s game, the ‘trigger’ took place 2:40 minutes into the game when we received an email referencing an event at the taking place at the “Library at 9pm”. By then we’d uncovered most of the clues about who the big bad guy was and what the motivation was; now we simply needed to go to the right place and confront the enemy! And of course, there was a fight.
Other triggers I have seen or used in my own games:
- You are rescuing a kidnap victim held in an impregnable fortress. You discover they will be relocated to a (train/space ship/helicopter) and that is the best time to attack and free the victim. At 2:30 hours into the game, you receive word the victim is being moved.
- You are exploring a dungeon. At 2:30 hours into the game, the next door you open is the lair of the boss monster. I redraw the map on the fly so that the final room or cavern is now at that point in the dungeon crawl.
- You are exploring a derelict spaceship. After the fourth room you investigate (regardless of where in the ship you are), the fifth scene kicks in, which is a boss fight with an enemy. This is the trigger technique of one of the one-sheets in the Savage Worlds Deluxe Explorer’s Edition.

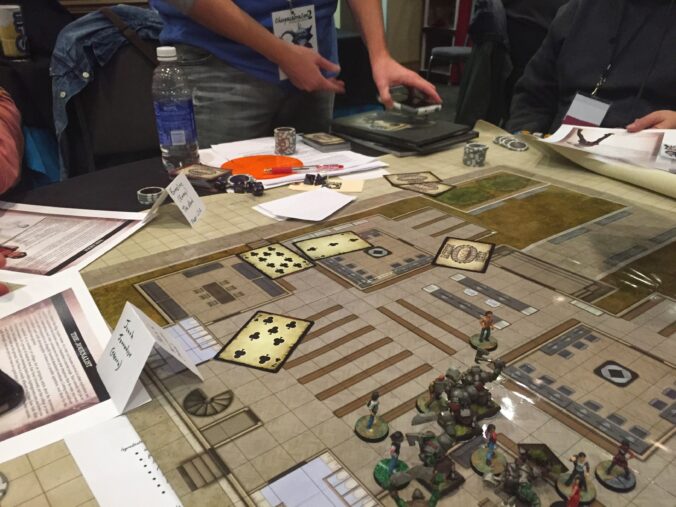
The final boss fight!
Rules
User-Friendly Rules Explanations
Shane described the rules in ways that didn’t assume you knew all the action and Edge names. For example, Shane asked me “Do you want to go all out when you attack?” He went on to describe a Wild Attack when I asked what that meant. Shane basically follows the “tell me what you want to do and we’ll figure out the rules to support it” approach which I think is great.
Critical Failures
I rolled ‘snake eyes’ and Shane made the declaration that “you can’t bennie snake eyes!” This made for a great roleplaying moment. Note that the Savage Worlds rules are (intentionally I think) ambiguous on if you can bennie and re-roll double ones / critical failures. I think each game or campaign should call out how the GM will rule on this matter. For my games, I always prefer the “you can’t bennie snake eyes!” ruling!

A critical failure!
All-in-all, it was a fantastic game! I hope to play in Clint Black and Sean Patrick Fannon’s games at some point as well — I always love learning from the masters!

Shane signs my Deluxe hardback at the end of the game 🙂
Lessons from Shane Hensley's Con Game: Initiative
After having reviewed how Shane Hensley set up his con game and his technique of using miniatures, I’ll now review how Shane handled initiative.

Dealt initiative cards
Shane used the normal sized Savage Worlds action card deck, not the over-sized style of cards. I’m a fan of over-sized cards since I have a hard time seeing the cards amidst all the clutter on the table. Not to worry — Shane used the technique of counting down initiative. He’ll simply start saying ‘Ace, King, Queen, 10…’ and counting down until people raise their hand or otherwise signal they have an initiative card that makes them up for their turn. If a couple of people raise their hand, Shane would adjudicate ties based on reverse alphabetical suit order per the standard Savage Worlds rules. After that player finished their turn Shane would glance at their card to see where the turn countdown had last left off, and resume a new coundown: “9, 8, 7…”.

Savage Worlds ‘Action Cards’ used for initiative — very Pulp-style!
Shane also used a technique of having the player flip a card over if that player was on hold to flag their held action. After the player finally acts later in the round he’d have the player flip the card back up to the regular side with suite and number.

An action card on hold
Another thing I noticed was Shane placing an NPCs card on a top corner of his GM screen. He could balance up to two cards up there and it made the cards easy to see and not get lost in the clutter of the table or in the clutter behind the GM screen.
I’ve seen some GM’s turn in the cards after their turn is over, but instead Shane waited until everyone completed their turn, then he asked for people to hand in their cards. At that point if a Joker had been drawn he’s shuffle the deck.

At the end of the turn we handed our cards back in.
Coming next: an analytics of Shane’s overall GM style and some of his in-game tricks!
Dicehaven Podcast
![]()
Dicehaven is an actual play podcast featuring various tabletop RPGs. We’re currently playing Imperium using the Traveller RPG (Mongoose 2nd Edition).
Listen now to our first episode.
Listen to us on iTunes, Spotify, and other platforms (links are at anchor.fm/dicehaven).
Follow our Instagram posts at instagram.com/dicehavenpodcast.
About Us
Hello and welcome to Dicehaven! We are a game club in the DFW area who play tabletop roleplaying games. Check out our RPG podcast and our musings and resources on roleplaying.
Recent Comments