Dicehaven

Tabletop RPG Podcast and Roleplaying Resources

Page 24 of 125

Stormtrooper Speed Test

I wanted to get a sense of the relative speed to run combat when using Traveller 2e, Star Wars: The Roleplaying Game 1e (the West End Games d6 version), and my own mass-combat wargame rules based on One Page Rules. Here are the results, along with my rules cheat sheet I used when running the mock combat.

The Setup

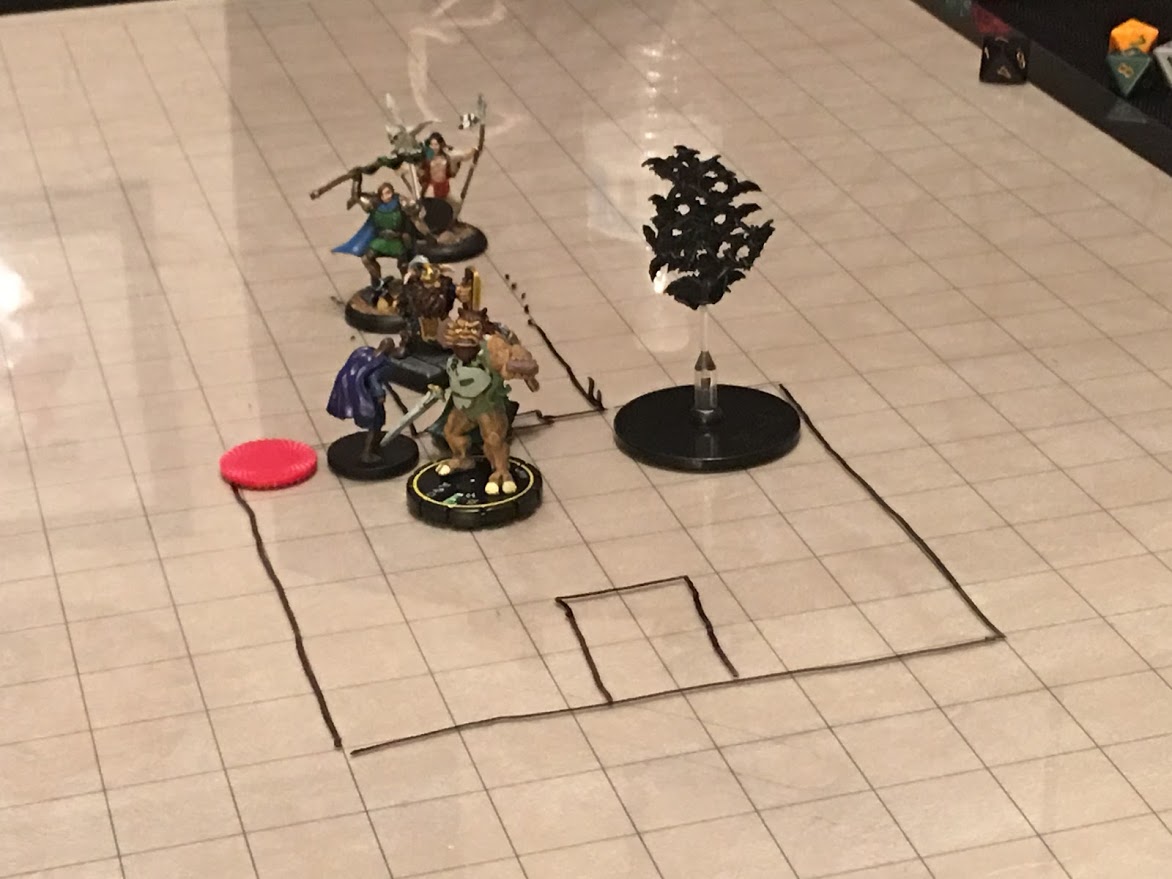
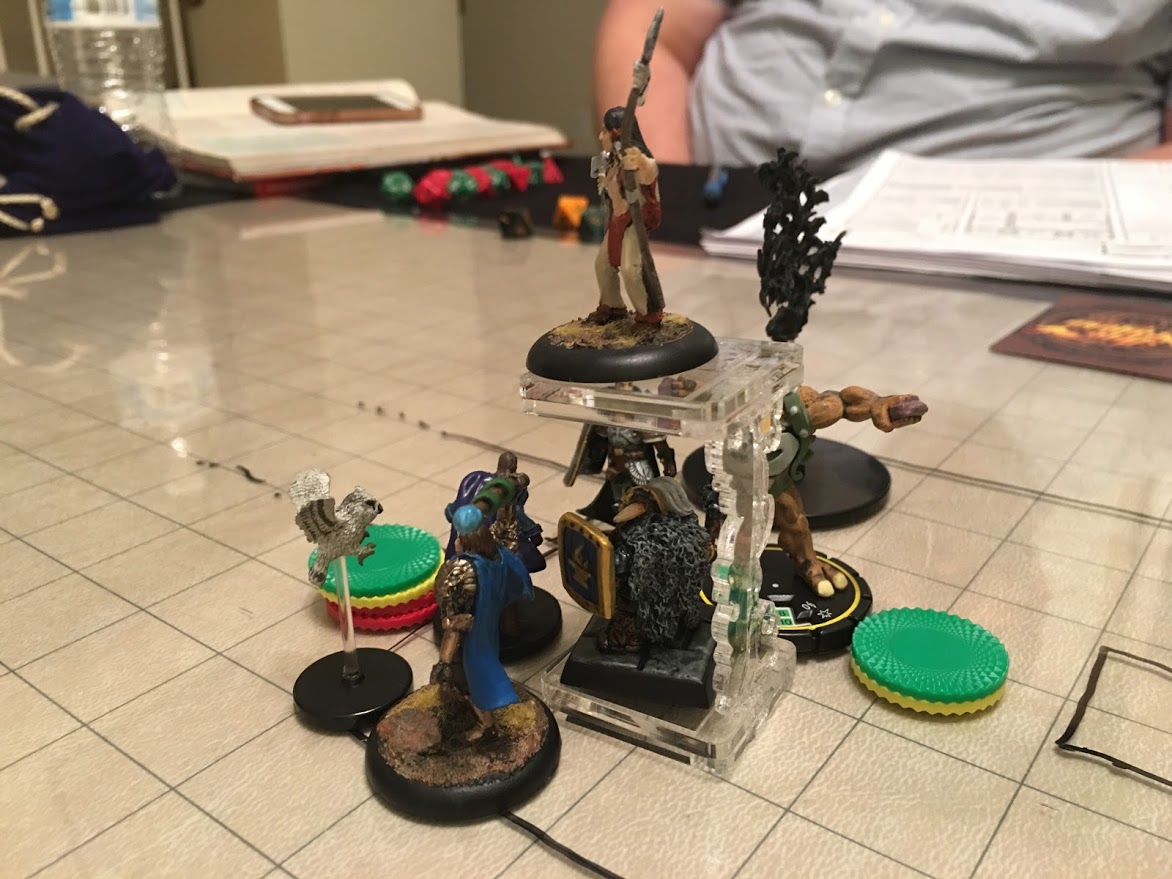
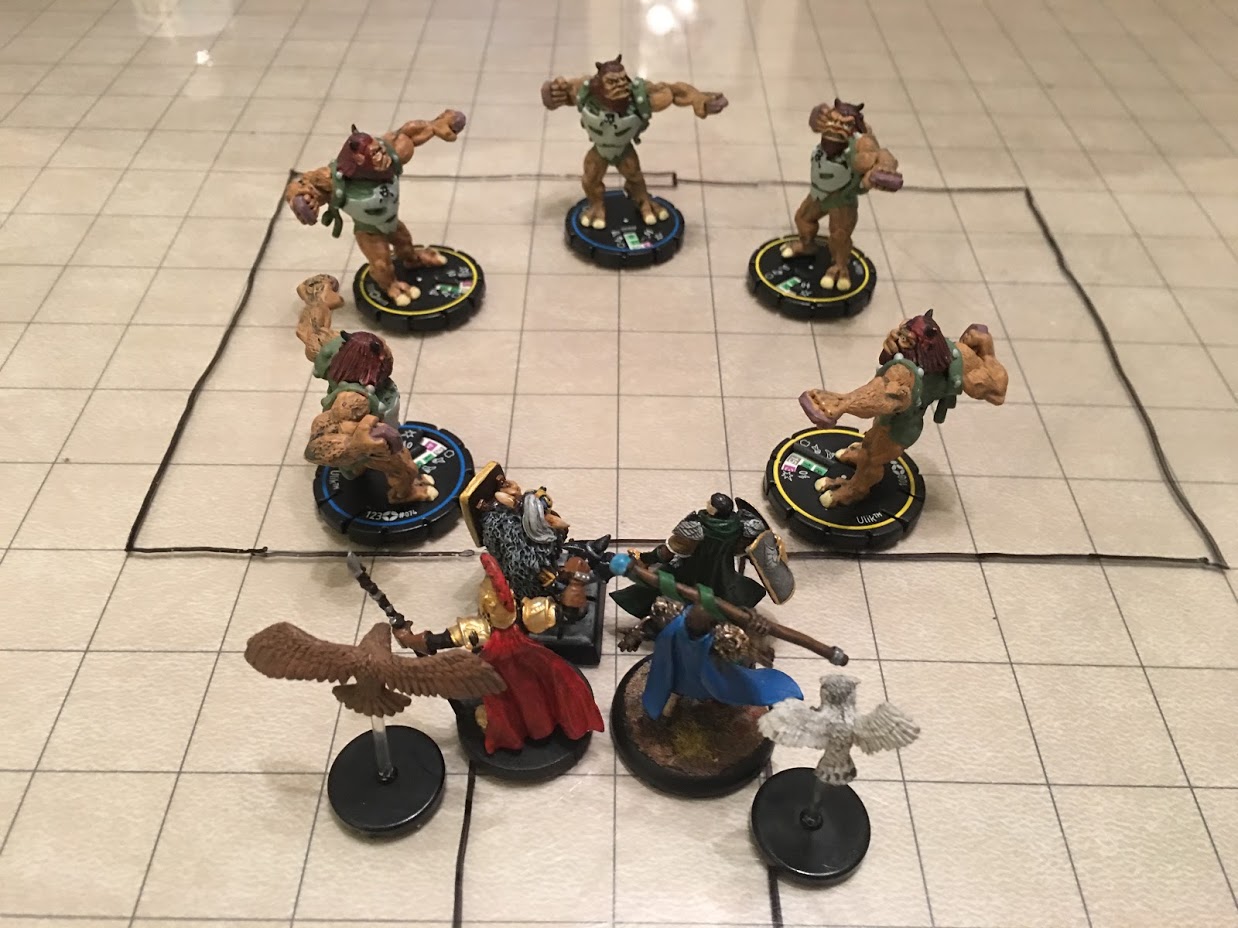
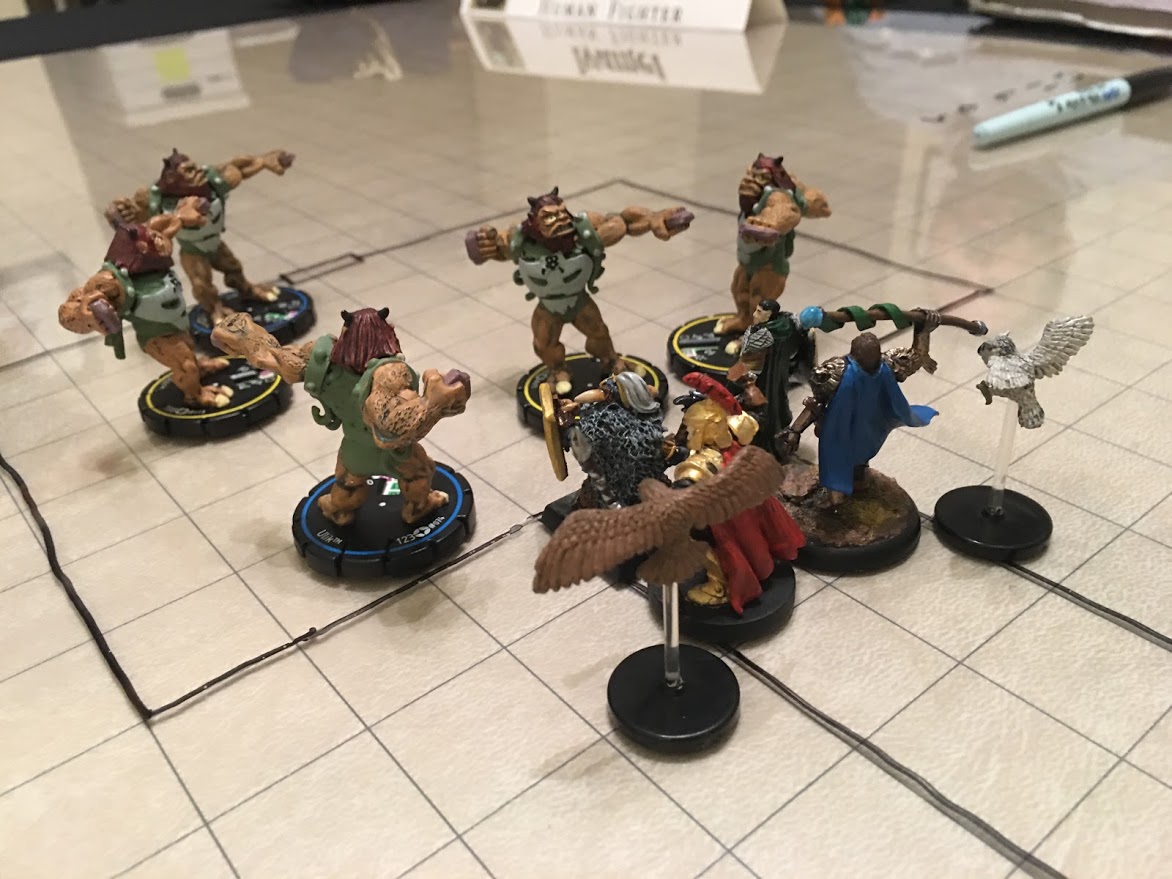
There are 5 Star Wars Stormtroopers firing at 5 Rebel agents who were discovered undercover, disguised in Stormtrooper armor. Both sides use identical stats.

Units don’t move, take cover, or do anything special (for example, characters don’t take reactions such as Dodge). It’s just a Napoleonic-era style division line fighting.

In the two RPGs, untill two opponents are down, fire at person across from you (or 1st person to your left if the person across from you is down). After two opponents are taken out, focus fire on the most wounded opponent. Combat continues until one side is eliminated.

After each round I stop to stap a picture of the end of round status.

Actual combat in a real RPG game would take longer than any of these simulations of course since there is table banter, people moving minis around, rules discussions, and so forth, so these numbers only give a relative sense of combat time.

The Results

One Page Rules Combat

[su_box title=”Wargame Stat Block” style=”default” box_color=”#8ff2ff” title_color=”#000000″ radius=”3″]

STORMTROOPER SQUAD [5]: Quality 5+, Defense 5+, Attacks: Assault Rifles (24”, A1), CCWs (A1)

[/su_box]

Combat Rules Summary

Attack: Roll d6s for each model to hit.

Damage: d6’s for each model to defend. 5’s or better hit, and 5’s or better defend. Hit models are removed from combat.

Wargame Combat Results

Wargame Combat Results

Star Wars d6 Combat

[su_box title=”d6 Stat Block” style=”default” box_color=”#8ff2ff” title_color=”#000000″ radius=”3″]

Imperial Stormtrooper: All stats are 2D except: blaster 4D, brawling parry 4D, dodge 4D, brawling 3D. Stormtrooper Armor: adds +1D to Strength code for damage purposes only. Reduces Dexterity code and all Dexterity related skills by 1D. Stormtrooper Weapons: Blaster pistol (damage 4D), blaster rifle (damage 5D).

[/su_box]

Combat Rules Summary

Attack: Blaster Rifle (5D to hit, TN 10 (for short range))

Damage: 5D damage – 3D Strength/Armor soak

Wound Resolution

Wound Taken: by comparison of rolls; Damage roll’s multiple of Strength+Armor.

  • DR<SR = Stunned (Prone, -1D per stunned level, if >= STR (2) unconscious, wears off end of creature’s next turn).
    Marked by [su_label type=”default”]Green Chips[/su_label]
  • DR>SR = Wounded (Prone, -1D till healed, can’t act this round).
    Marked by [su_label type=”warning”]1 Yellow Chip[/su_label]
  • DR>2xSR = Incapacitated (Prone, out of combat).
    Marked by [su_label type=”success”]1 Red Chip[/su_label]
  • DR>3xSR = Mortally Wounded (Prone, out of combat).
    Marked by [su_label type=”success”]2 Red Chips[/su_label]

Model Down = prone.

Prone Characters: +2 target number to hit , -1D on skill checks, costs an action (at -1D) to rise from prone. You can always fall prone without penalty at the end of your movement.

House Rule: A Strength to resist damage roll must be at least double the damage roll to completely soak it, so just beating the damage roll (but less than double) is still a stun (for normal damage). (this is from the 1e Rules Companion)

Combat Rules Outcome

d6 Combat Results

d6 Combat Results

Traveller Combat

[su_box title=”Traveller Stat Block” style=”default” box_color=”#8ff2ff” title_color=”#000000″ radius=”3″]

Imperial Stormtrooper 7773C8 Age 22  1 term Cr12,000
Skills: Rifle-2, SMG-2
Gear: Blaster Rifle 3D, Stormtrooper Armor +8 Protection

[/su_box]

Combat Rules Summary

Attack: Blaster Rifle (+2 to hit, TN 8)

Damage: 3D damage – 8 Armor soak.
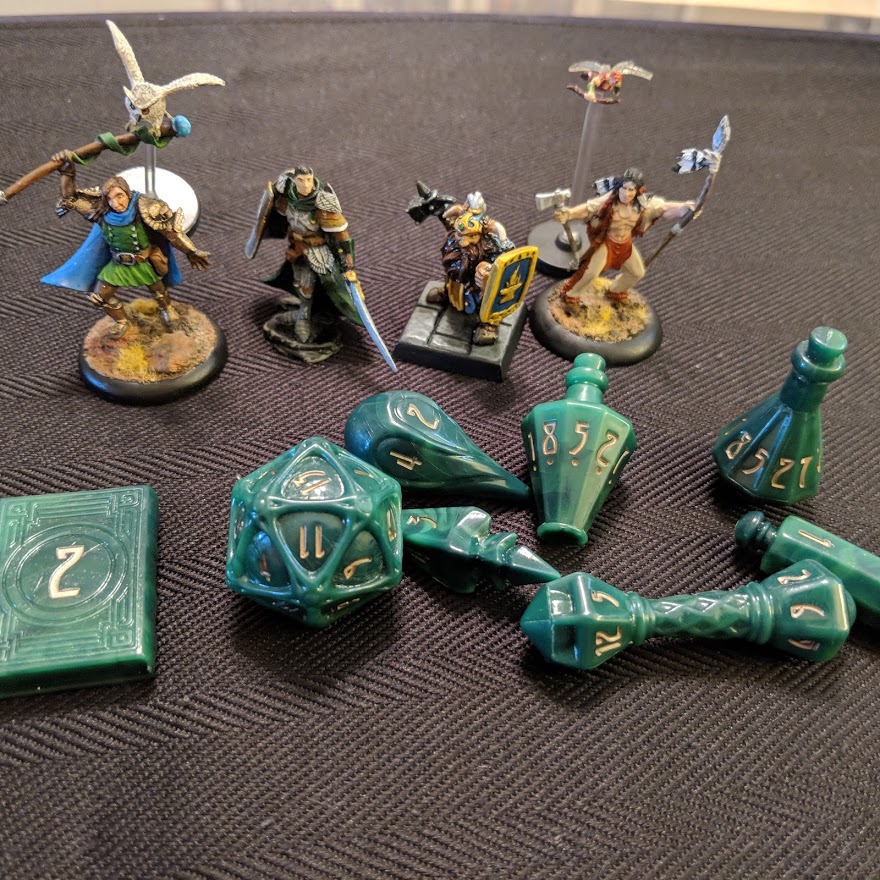
Wound Resolution

After 14 points of damage the character is out of combat.

  • 1-6 Hits
    Marked by [su_label type=”default”]Green d6[/su_label]
  • 7-12 Hits
    Marked by [su_label type=”warning”]Yellow d6[/su_label]
  • 13+ Hits
    Marked by [su_label type=”success”]Red d6[/su_label]

Combat Rules Outcome

Traveller Combat Results

Traveller Combat Results

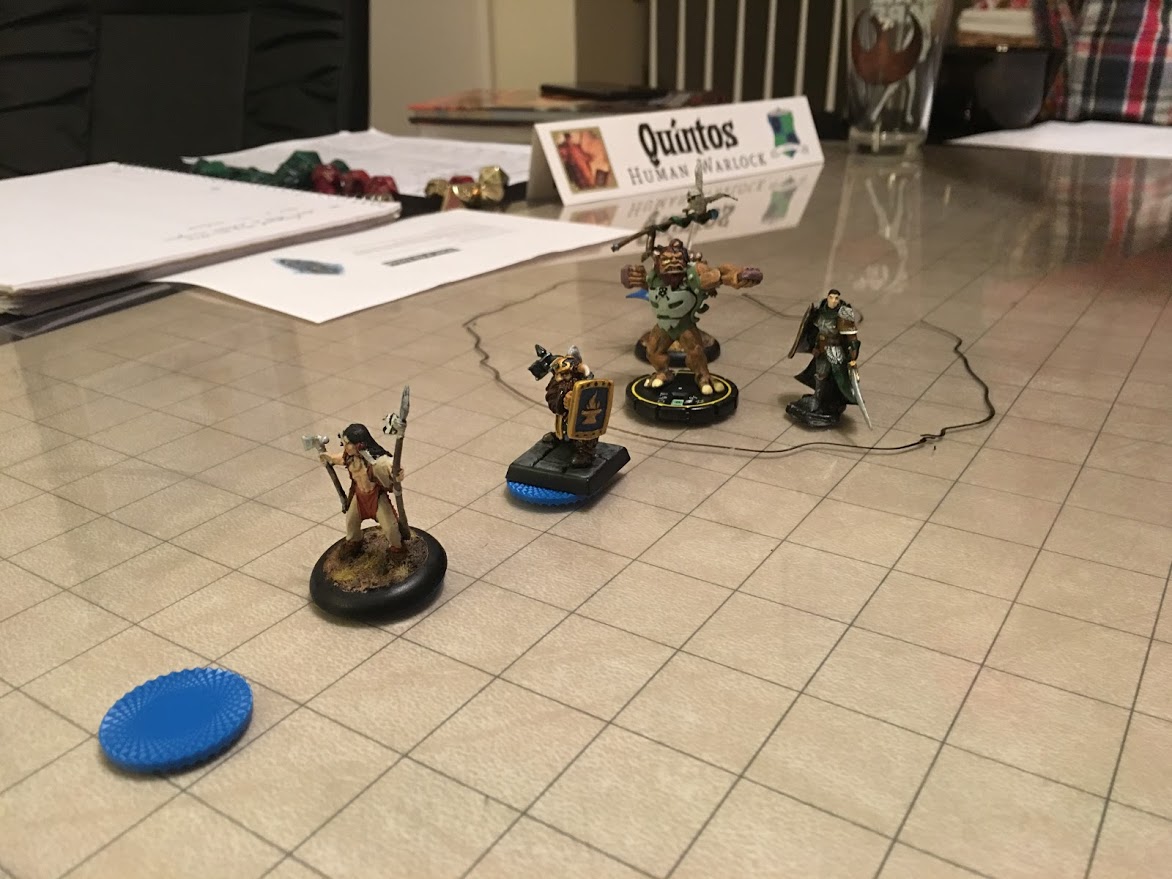
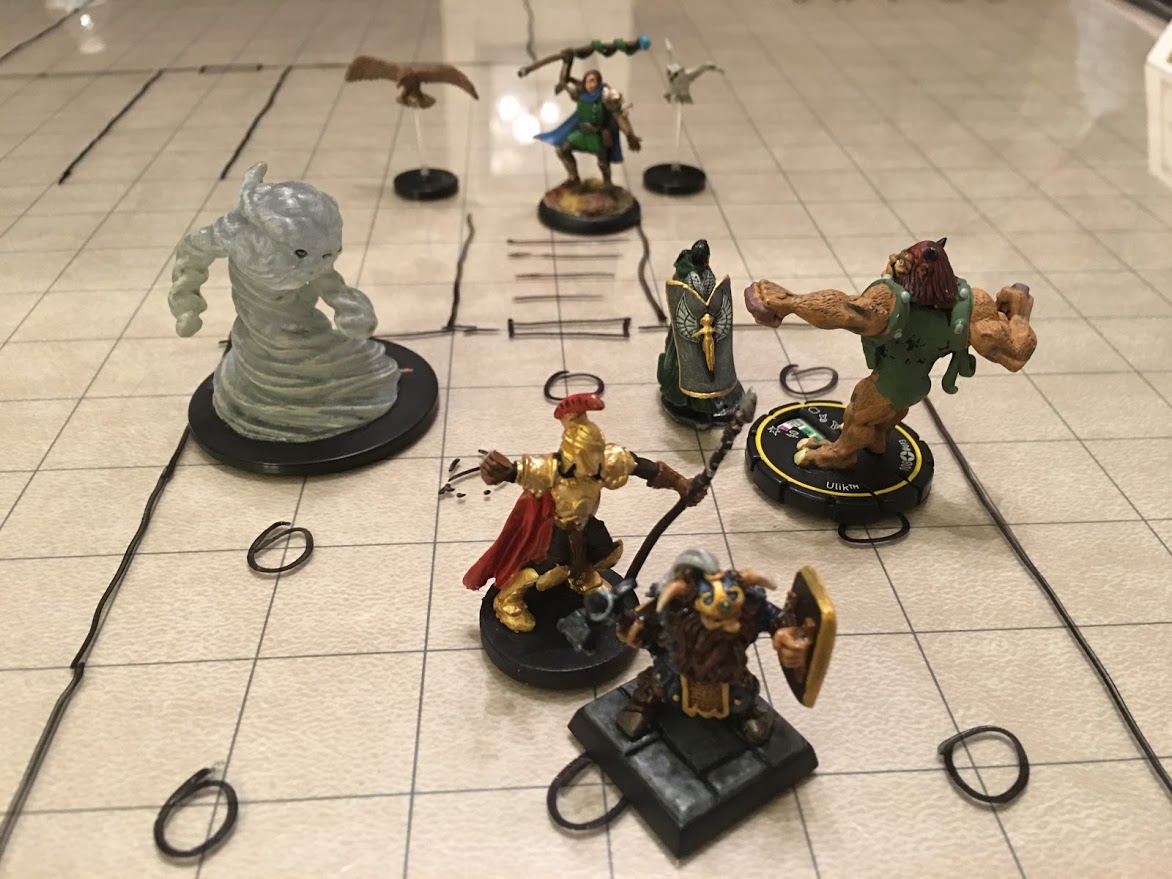
Tracking Conditions in Star Wars d6

After running the simulated combat here’s what I am thinking about tracking damage in Star Wars:

Initial Thinking

  • Prone — Lay the model down on the table to indicate they are prone / crawling.
  • Shaken (1 Green Poker Chip) — The condition of ‘you can’t act’ we will call ‘Shaken’. We will house rule Shaken to clear at the end of the creatures next turn (as opposed to ‘can’t act this round or next’).
  • Stunned (1+ Yellow Poker Chips) — We track stunned with Yellow Poker Chips. You can have multiple Stunned tokens. Stunned effect clears at the end of the creatures next turn.
  • Wounded (1 Red Poker Chip) — We track stunned with a Red Poker Chip. Note that you can’t clear this condition during combat.
  • Incapacitated (1 Black Token) — Usually you remove incapacitated enemy NPCs or creatures from the board, but if you want to keep them on the board (for example, you want to keep the opponent alive and need to know how bad they’re hit) you can keep them on the board with one Black Token.
  • Mortally Wounded (2 Black Tokens) — Like incapacitated, but with 2 Black Tokens.
  • Dodge — We don’t track creatures doing a Dodge with Tokens. Instead, players track when their character does a Dodge and alerts the GM when it impacts combat. The GM tracks NPCs doing a Dodge. Usually, only important named NPCs would do a Dodge action.

After this initial post I came up with another way to track damage

  • Prone — Lay the model down on the table to indicate they are prone / crawling.
  • Stunned (1+ Green Poker Chips) — We track stunned with Green Poker Chips. You can have multiple Stunned tokens. Stunned effect clears at the end of the creatures next turn.
  • Wounded & Can’t Act (2 Yellow Poker Chips) — We track Wounded and Can’t Act with a Yellow Poker Chip. Note that you can’t clear wounded condition during combat, but the Can’t Act clears at the end of the character’s next turn.
  • Wounded & Can Act (1 Yellow Poker Chip) — We track Wounded with a Yellow Poker Chip. Note that you can’t clear this condition during combat.
  • Incapacitated (1 Red Chip) — Usually you remove incapacitated enemy NPCs or creatures from the board, but if you want to keep them on the board (for example, you want to keep the opponent alive and need to know how bad they’re hit) you can keep them on the board with one Black Token.
  • Mortally Wounded (2 Red Chips) — Like incapacitated, but with 2 Red Chips.
  • Dodge — Dodge action is tracked using special acrylic Dodge tokens.

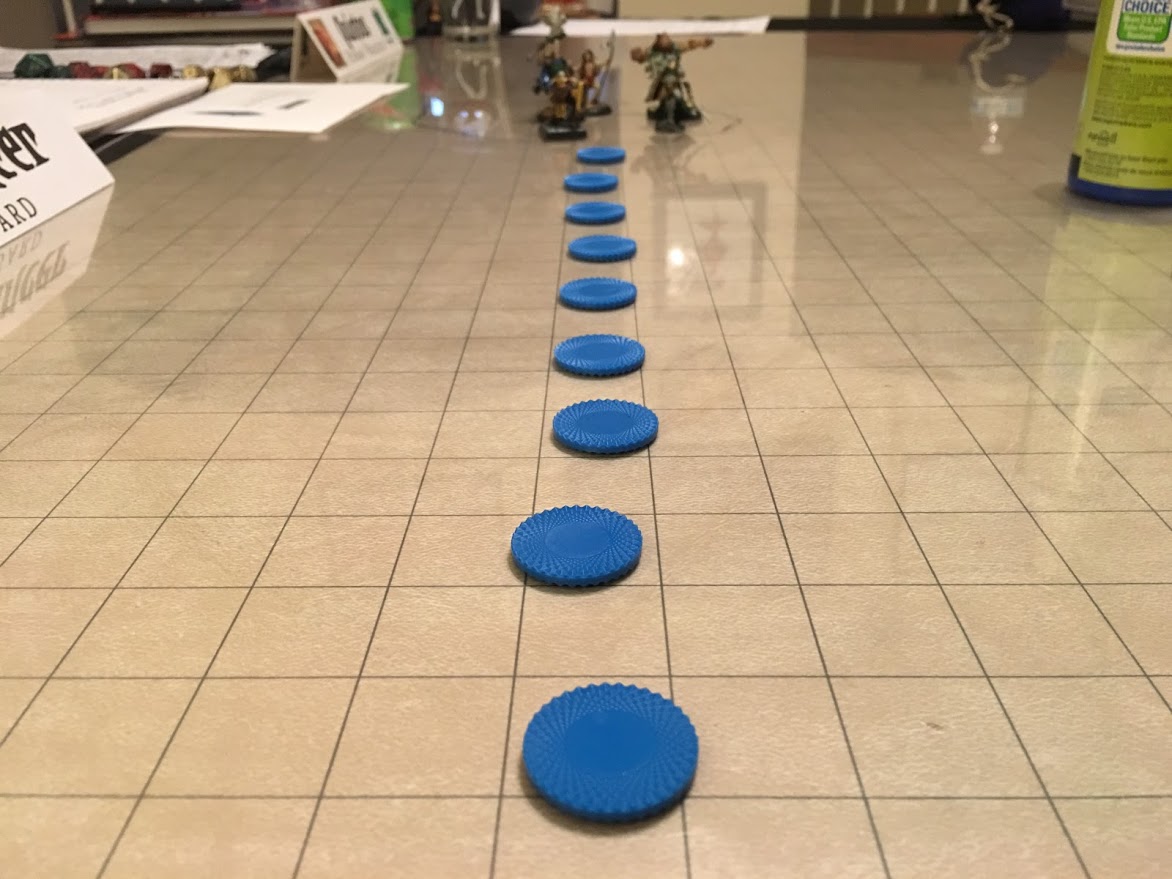
Also consider using Litko tokens such as these:

Analysis

Here are the key metrics from the simulation:
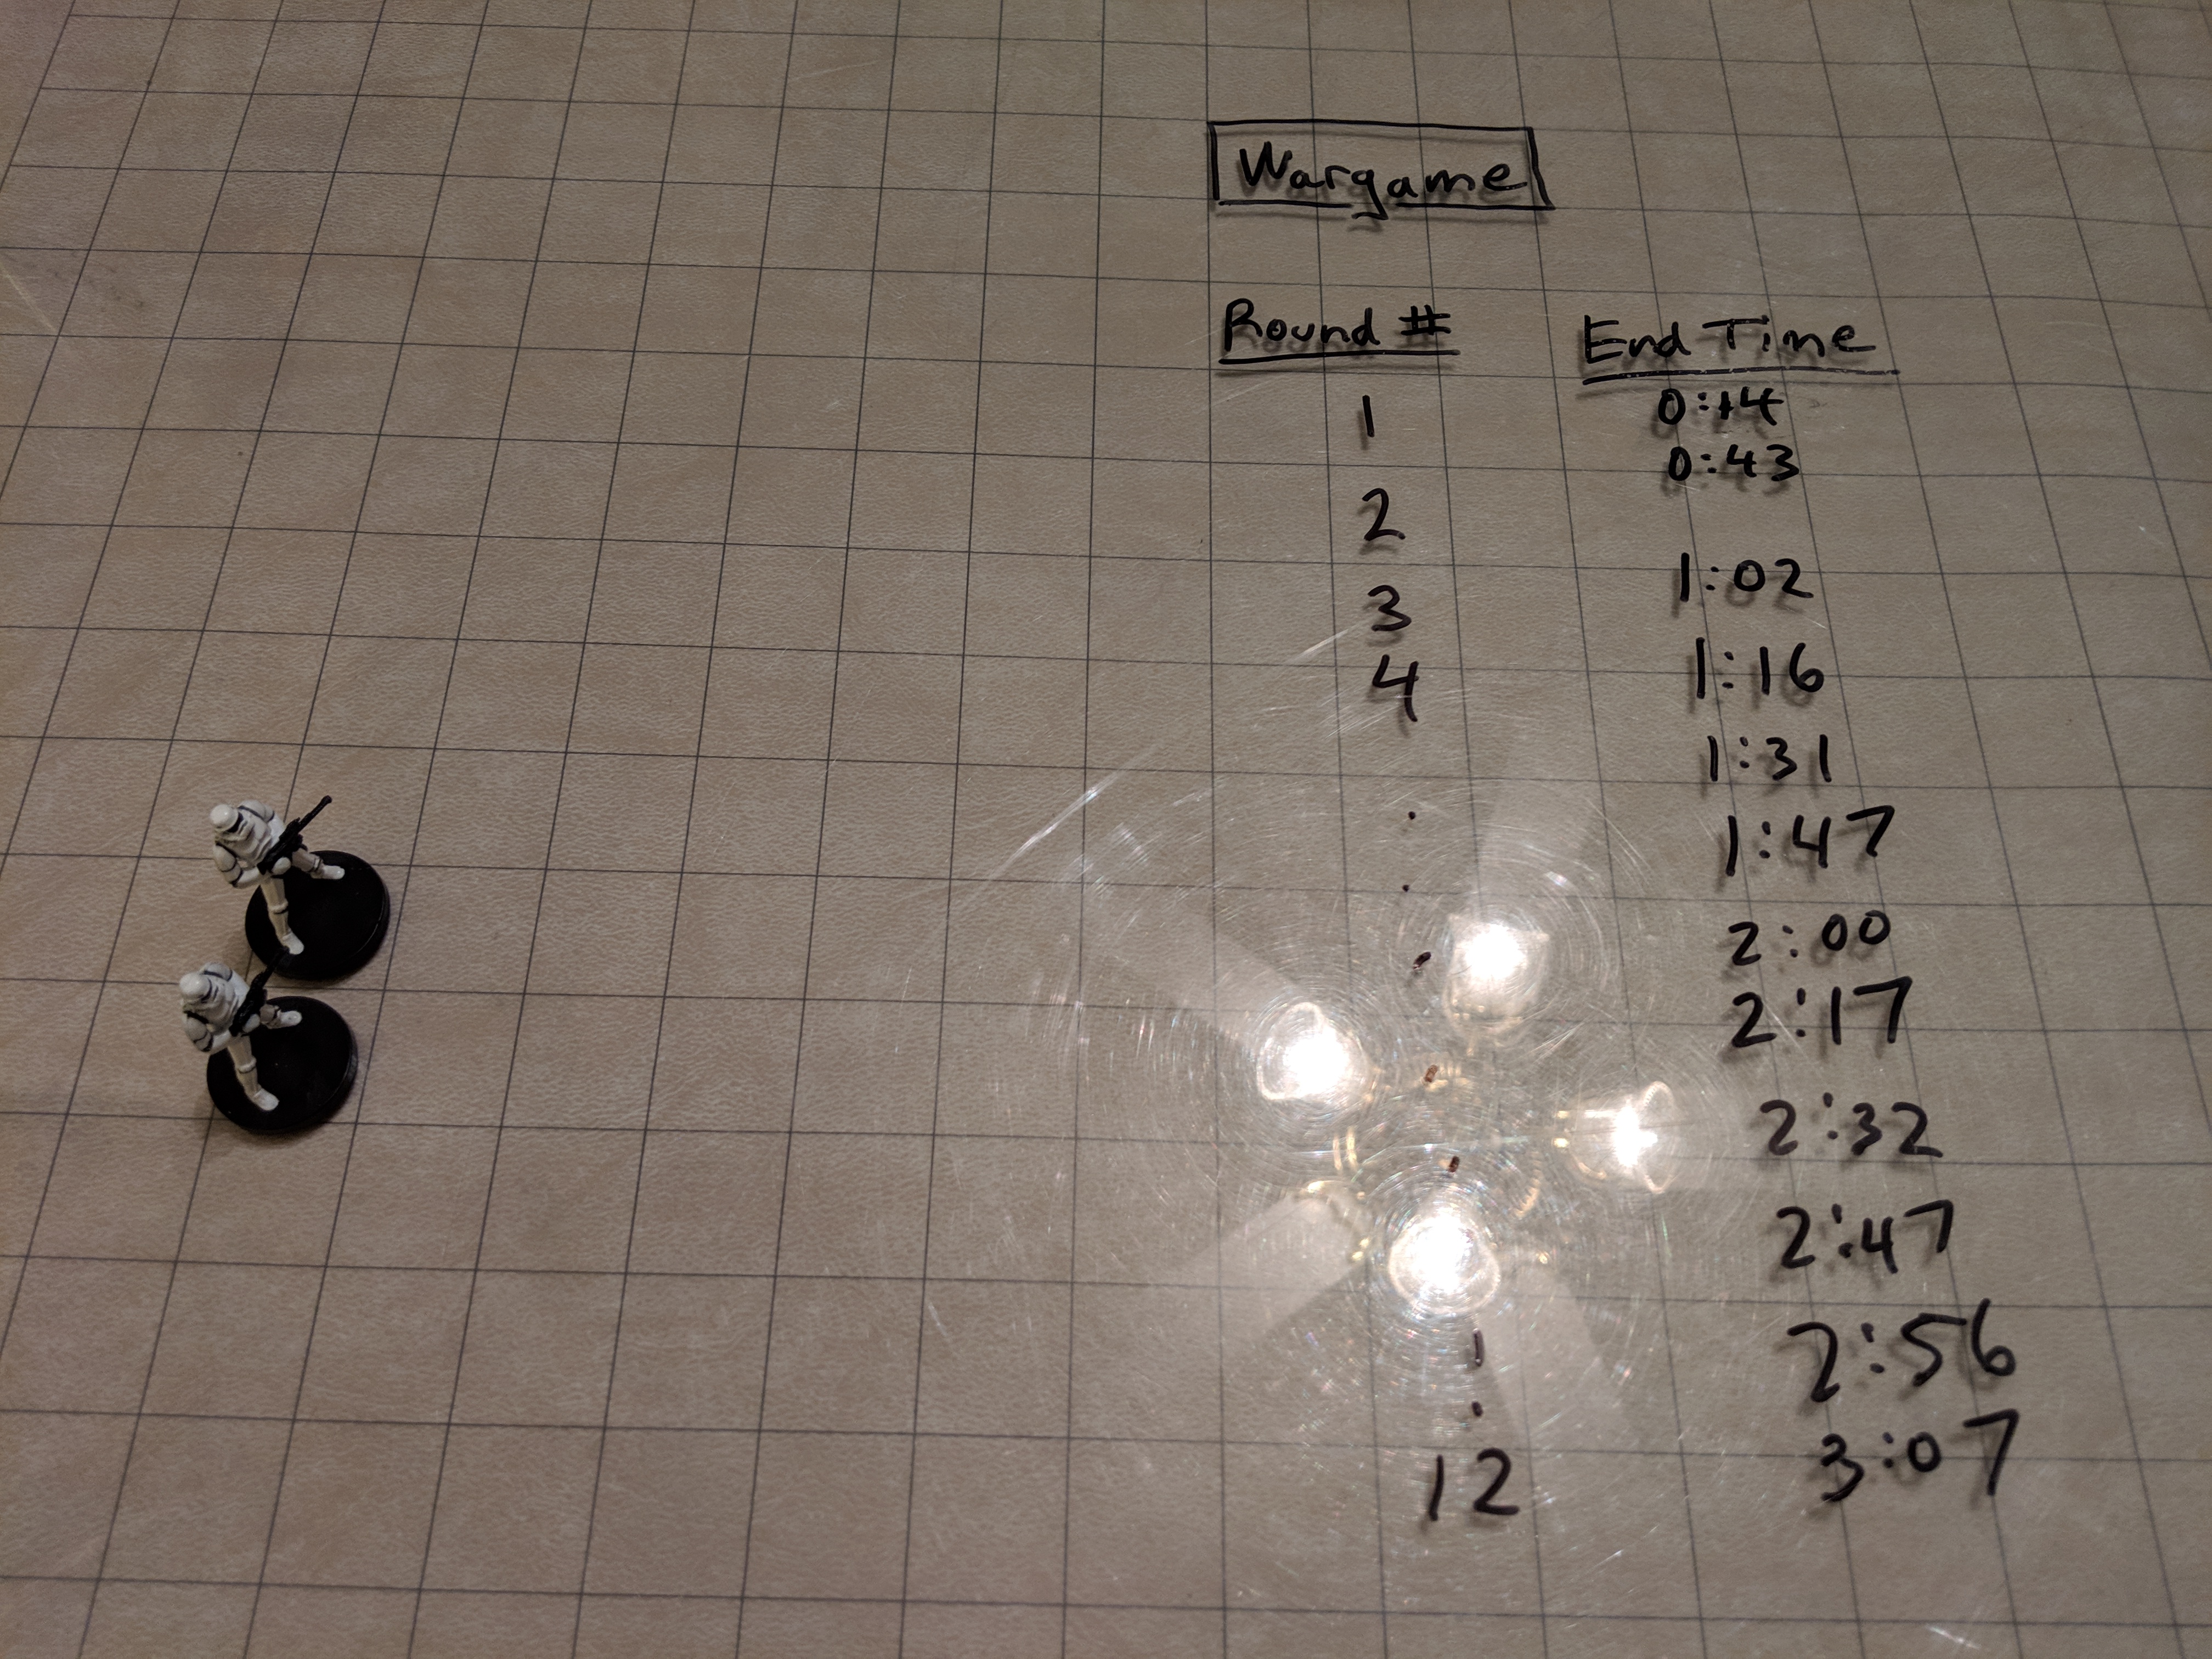
Wargame

  • 12 combat rounds
  • Total Time 3:07 minutes = (3*60)+7 = 187 seconds
  • Average Round = 16 seconds
  • Average Time Between Player Dice Rolls = 8 seconds

Star Wars d6

  • 3 combat rounds
  • Total Time 5:53 minutes = (5*60)+53 = 353 seconds
  • Average Round = 118 seconds
  • Average Time Between Player Dice Rolls = 59 seconds

Traveller

  • 6 combat rounds
  • Total Time 11:52 minutes = (11*60)+52 = 712 seconds
  • Average Round = 119 seconds
  • Average Time Between Player Dice Rolls = 119 seconds

Insights

OPR Wargame rules are 4x Faster than Traveller — The One Page Rules wargame system is about 4 times faster than Traveller combat. So you can run a mass combat that would take 2 hours in only 30 minutes when using OPR wargame rules.

Star Wars Combat is as Fast or Faster Than Traveller — Star Wars d6 combat resolved in half the time the same combat took to resolve in Traveller. Part of this I think is Traveller armor provides serious protection, whereas the Stormtrooper armor I think was a bit nerfed. If you increased the Strength and/or Armor of Star Wars combatants, I think it would take longer to resolve. This was surprising to me; I assumed that the different wound levels would increase combat time. Aside from this though, it seemed it was easier to hit opponents in Star Wars d6, making me think that surprising opponents and taking cover is a big deal, maybe even more impactful than in Traveller.

d6 Math is Simple and Fast — Star Wars d6 flowed much more smoothly than I expected. I was thinking it would feel more like Savage Worlds. What I noted was that (like Traveller) dice selection was fast (everything is a d6, unlike Savage Worlds or D&D). In Star Wars d6, most math is addition, with the only other math the quick multiplication of comparing Damage to Strength. It’s pretty simple to eyeball a number and say “is my Damage double the Strength roll?” You don’t even have to do the math — I can quickly decide 13 Damage is higher than but not double a Strength roll of 11 even without doing the multiplication. So in most cases you’re just adding dice scores together. Thinks like Armor let you add or subtract dice from the dice pool which is easier than math (this reminded me of Cortex, where physically adding and subtracting dice is done before the roll, making things easier). Compare this to Star Wars d6 2e or Savage Worlds where you take the results and do division on it to determine wounds. Even Traveller feels a bit more complicated — you’re subtracting 8 from the skill check to determine the Effect, and then subtracting Armor from the Damage result. Star Wars d6 notion of ‘add, compare’ feels simpler and faster than Traveller’s ‘add, subtract, add, subtract’ or Savage Worlds ‘add, explode, add, divide, compare’.

Traveller is More Predictable — Star Wars feels more ‘swingy’ than Traveller and its harder (for me anyway) to eyeball and determine likely outcomes. Traveller is more consistent (target number is always 8) and damage and the outcome of battles seems more even and predictable.

Damage Tracking Using Tokens in Star Wars is Smooth — Damage tracking was simpler in Star Wars than I was expecting when using Tokens. For Traveller, I use d6s which take a second to flip around to find the right set of pips on the die. Colored tokens in Star Wars can be placed under the mini and take less space on the battlemat. Unlike Savage Worlds, there is no ‘unshake’ option, so (aside from Stunned tokens), wounds, once received, stay with you. So combat is fast, and there is not a lot of extra dice rolls or fiddling with tokens to unshake or remove tokens.


Redmark Session 43: Cuddle-Flying Through the No-Magic Zone

Redmark Date: Third Age—April 21, 1331

Say Bye-Bye to Magic

Our adventurers—and Quintos’s new flesh golem—go down a hallway and find a strange metal gate (out of game, a very big turnstile). The gate allows them to enter but not to exit. Ghost must leave his glorious Axe Beak at the gate. “Wait for me,” Ghost says to Axe Beak. The Axe Beak shrugs and eats a scuttling cockroach.

Around the corner, the party finds themselves in a giant cavern with pulsing green lights in the ceiling. Kind of like a rave.

A series of small platforms hang from the ceiling, forming a very dangerous way to cross the 50-foot pit filled with boiling mud.

No problem. We’ll cast spells and fly across.

Lundie snorts pixie dust from Fire Willow. The party ties a safety line around him, and he leaps. His magic fails and he plummets toward the boiling mud. (Mmmm. Roast Dwarf.) Fortunately, the safety line saves him.

This cave is a no-magic zone.

Though the party is unable to solve the riddle of the cave, they figure out that they can get a fly spell to sorta work when the 2 Urthjarl stones are together. The group has to huddle together to all fly across. Quintos calls it Cuddle-flying. He seems disturbingly happy about Cuddle-flying. The flesh golem can neither confirm nor deny that he was groped several times during the Cuddle-flight.

Vampire Lair

On the other side of the pit, another hallway that ends in a door. The door opens into a magically pitch-black room, home to a vampire and his bat swarm.

And epic battle of good versus evil erupts.

The highlight of the battle seems to be a moment when Ivamel shouts at Quintos: “Look, I can take two steps into the room and turn left and swing at the vampire even if I can’t seem him. It’s not like I’m retarded.”

The party dishes out punishment to the undead monster until, nearing death—permanent death if it loses all its life force in its lair—the vampire disappears in a puff of smoke and escapes.

He’s still out there, somewhere.

But, he left behind all his loot. The party finds a bunch of stuff in the room, headlined by a mythical weapon for Lundie: “Whelm” the sentient +3 warhammer from the 2nd Age.

LOOT REPORT

  • “Whelm” the sentient +3 warhammer from the 2nd Age
  • 6 leather sacks filled with—
    • 18,000 sp
    • 9,000 gp
    • A potion as yet undetermined
    • 3 spell scrolls
      • Conjure minor elemental
      • Dispel magic
      • Magic mouth
The Floating Disks

 The Floating Disks

Walking Across the Floating Disks

 Walking Across the Floating Disks

The Vampire's Lair

The Vampire’s Lair

A Vampire Emerges

 A Vampire Emerges

The Fight with the Vampire

 The Fight with the Vampire

Cool Dice and Minis!

 Cool Dice and Minis!

Redmark Session 42: We Found Where the Janitor Kept His Keys

Redmark Date: Third Age – April 20, 1331

Marcus catches a Wave

As the loot from the crab filled room is passed around.  Marcus is handed the trident.  It is a sentient weapon that is called Wave.  Marcus ponders changing his religion.

Ghost Dancer casts Leomund’s Tiny Hut for the group to rest in.  Something must go wrong with the casting this time as inside the hut it is usually warm and humid.  Ivamel does not get a good nights rest.

Redmark Date: Third Age—April 21, 1331

A puzzle and golden orbs

The party heads back towards the entrance to the dungeon.  Marcus spends some time discussing various points of interest with the sphinx near the entrance.  Nothing much comes from this, other than time is wasted.  Marcus casts water walking on the group and they continue down the hallway to the east.  This time easily bypassing the acid on the floor that stopped them before.  Ivamel notices it appears to be some sort of slime.

Coming to a split in the hallway, the group finds a room filled with Flesh Golems.  The Flesh Golems are numbered 5, 7, 9, 11, & 13.  The Flesh Golem numbered 5 says, “The one not like the others will serve you.”  Quintos quickly blurts out “Nine, it’s not prime!”.  Number 5 looks downtrodden (or is it Stan) by the quick answer.  Now, #9 is a servant of Quintos.

Down another hallway, the group finds a room filled with 9 silvered glass globes.  One by one the group breaks each globe.  In an effort to determine what to do, Marcus prays to … well no one is quite sure at this point … but it was some god.  Finding several items inside the globes (see Loot Report). 

Loot Report

  • Nine keys – from inside the globes
  • First globe =  600 GP worth of gems
  • Second globe = Potion of Flying
  • Third globe = Empty (except the grey ooze and a key)
  • Fourth globe = scroll of hold person
  • Fifth globe =magical silver ring that Ivamel quickly placed on his finger
  • Sixth globe = 600 GP
  • Seventh globe = grey nuggets (any value) & 3 shadows
  • Eighth globe = scroll of fear
  • Ninth globe = 12,000 GP & and a Air Elemental


Redmark Session

Redmark Session


All About GM Screens

So are GM Screens helpful?

History

The original DM’s Screen of the mid to late 70s was a 3 ring binder which you used to hide your maps and monster stats.

Pic of Gary Gygax and his Dungeon

Gary Gygax and his Dungeon

Generally these could be in your lap or propped up on the table.

Pic of Stranger Things 3 Ring DM Binder

Stranger Things 3 Ring DM Binder

Later, D&D modules often included a cardboard map which you could pull out and use with one side as a player facing art, and the internal side being the dungeon map.

GM Screen Uses

The primary uses for a GM screen are:

  • Hiding GM maps
  • Hiding miniatures of upcoming monsters
  • Hiding upcoming props and handouts
  • Hiding GM dice rolls
  • Providing a GM quick reference

I’ve done some online polling in the past, and generally what I find is that 2/3s of GMs of D&D style games prefer using a GM screen (which makes sense since they have maps and miniatures to hide), whereas about 2/3s of GMs running non-D&D style games prefer NOT to use a GM screen.

Stan’s Technique

It’s all a matter of personal preference of course, but here’s my preferences:

For D&D Style Games

I like to use a thinner version of what amounts to a 3 Ring binder. It’s a two-panel restaurant menu with inserts — art for the players side and a portfolio of clear sleeves (cut out from an art display binder) on the inside. I use it just like a 3 ring binder (in my lap or propped up on the table) but its a lot lighter.

  • Hiding GM maps — I have them as an insert in the restaurant binder
  • Hiding miniatures of upcoming monsters — I have a wood chest next to the GMs chair I use for that
  • Hiding upcoming props and handouts — I hide these in a folder next to the GMs chair
  • Hiding GM dice rolls — I usually roll in the open, or if needed, hide the roll with my hand
  • Providing a GM quick reference — I have GM cheat sheets, stat blocks, and adventure notes in the two-panel restaurant menu

Another technique I’ve used is to use a traditional GM screen which GM reference notes but to lay it down on the table — essentially a placemat with a rules cheat sheet.

For Non-D&D Style Games

Usually I do the above, but with a digest sized 3 ring binder, such as my Traveller binder.

Why the smaller footprint? I like the smaller footprint (easier to see over), but whereas D&D has so many maps from modules that look best at 8.5×11″, in story games or Traveller, I don’t have to worry about large maps so I go with my preferred smaller digest size.

Conclusion

It’s all personal preferences, but those are mine! I especially don’t like having to reach over a GM screen to draw maps, and I don’t like hiding dice.


Dr. Presto in Cortex Prime

Dr. Presto

Cover Name: Dr. Presto                      Real Name: Stefano Romano

Affiliations: Solo d6, Buddy d10, Team d8

Values: Duty d6, Glory d8, Justice d8, Love d8, Power d6, Truth d6

Distinctions (d8 or d4 +1 PP): Mystic Defender of Overlooked Victims, Stage Magician, Celebrity in the Spotlight

Power Set: Confusion

  • Cause Retreat d8 (target retreats)
  • Friends Are Foes d10 (cause target to attack another person)
  • Hallucinations d10 (cause target to act in an irrational manner)

SFX: Area Attack. Target multiple opponents. For every additional target, add d6 and keep +1 effect die.

SFX: Multipower. Use two or more Confusion powers in your dice pool, at –1 step for each additional power.

SFX: Darkest Magic. Step up or double any Confusion power for one action. If the action fails, add a die to the Doom Pool equal to the normal rating of that power.

Limit: Focus Item. Lose your cane’s crystal and lose your Confusion abilities to gain 1 PP. Test to recover.

Specialties: Stage Magic d6, Psychology d6, Fencing d6, Sleight of Hand d6

Signature Assets: Crystal pommelled silver sword cane d6

Relationships:

  • PCs: The Shade (Ralph Messano) d10, The Mantis d8, Mr. Morbidis (Eli Levine) d6, Lucky Devil (Bizhanee Chindi) d6
  • NPCs: Helen Rourke (Police Clerk) d10, Jimmy “Knuckles” Savage (Small Time Thug) d6, Mickey O’Conner (Night Club Owner) d8

Milestones:

I Am More Than A Magician
1xp when you use stage magic to influence others without using mystic powers
3xp when you gain notoriety for something that didn’t involve using your powers
10xp when you personally defeat a major villain without magic or forsake being a stage performer

Agent of the S.B.I.
1xp when you uncover a secret clue to an erstwhile crime or villain
3xp when you emerge successfully from a battle or conflict
10xp when you defeat a major, named villain or abandon your S.B.I. mission

Background:

Stephano Romano was born in Italy, but is now a naturalized American citizen. He initially lived in New York City with a practice as a psychologist. Dr. Romano’s hobby as a stage magician burgeoned and interest in finding the ‘true’ mystic arts led him to uncover magical powers from the study of ancient European grimoires. After acquiring the ability to confuse people with a crystal mounted on his sword-cane, Stephano turned to a life of fighting street crime by night, seeking to avenge his patients who had psychological scars from the thugs who have brutalized them. Now, relocated to Washington, D.C., Stefano has taken the alias ‘Dr. Presto’ and continued to wage a secret war with the forces of evil.

« Older posts Newer posts »

© 2024 Dicehaven

Theme by Anders NorenUp ↑